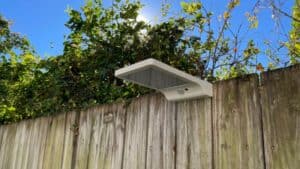
Looking to brighten up your yard with eco-friendly lighting? Outdoor solar lights are a great choice. They’re easy to install and don’t need wiring. To get the best results, place your solar lights where they’ll get plenty of sunlight and highlight your garden’s best features.
Solar lights can make your outdoor space look amazing at night. They come in many styles, from string lights to pathway markers. You can use them to light up walkways, accent plants, or create a cozy atmosphere on your patio.
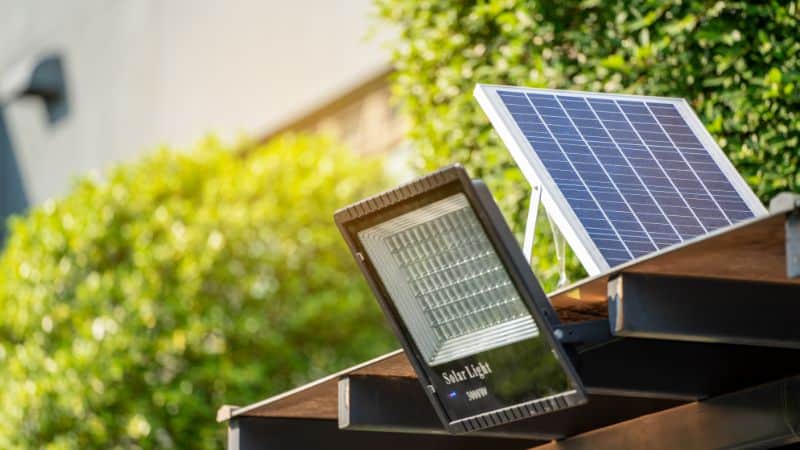
When you install solar lights, think about where shadows fall during the day. Avoid putting them under trees or near walls that block the sun. With the right setup, your solar lights will shine bright all night long, saving energy and adding beauty to your yard.
Planning Your Solar Light Installation
Good planning is necessary before you set up your outdoor solar lights. Let’s look at the important steps to plan your installation.
Assessing Sunlight Exposure
Start by checking how much sun your yard gets. Walk around at different times of day to spot the sunniest spots. These are ideal for solar lights. Look for areas that get at least 6-8 hours of direct sunlight daily.
Watch out for shadows from trees, buildings, or fences. They can block sunlight and reduce your lights’ performance. Consider seasonal changes too. A spot that’s sunny in summer might be shaded in winter.
Make a simple map of your yard. Mark the sunny and shady areas. This will guide you in placing your solar lights for the best results.
Determining Lighting Needs
Think about why you want outdoor lighting. Is it for safety, decoration, or both? This will help you decide what types of lights to use.
For paths and steps, consider low-level lights. They make walking safer at night. For sitting areas, brighter lights can create a cozy atmosphere. Accent lights can highlight plants or garden features.
Count how many lights you’ll need. Don’t overdo it – too many lights can look cluttered. A good rule is to space path lights about 6-8 feet apart.
Think about light colors too. Warm white light is relaxing, while cool white is better for task lighting.
Choosing High-Quality Solar Lights
- A high-quality solar light ensures a durable and effective outdoor lighting setup.
Look for options made from sturdy materials to withstand various weather conditions. One excellent choice is the M&F Solar Lights, recognized for their durability and efficient performance.
M&F Solar Lights are designed with efficiency, featuring high-quality solar panels that maximize sunlight absorption. This means they charge effectively, even on cloudy days, and can provide consistent lighting throughout the night. Additionally, they typically come equipped with lithium-ion batteries, which offer longer life spans compared to other battery types. They can shine brightly for extended hours after sunset.
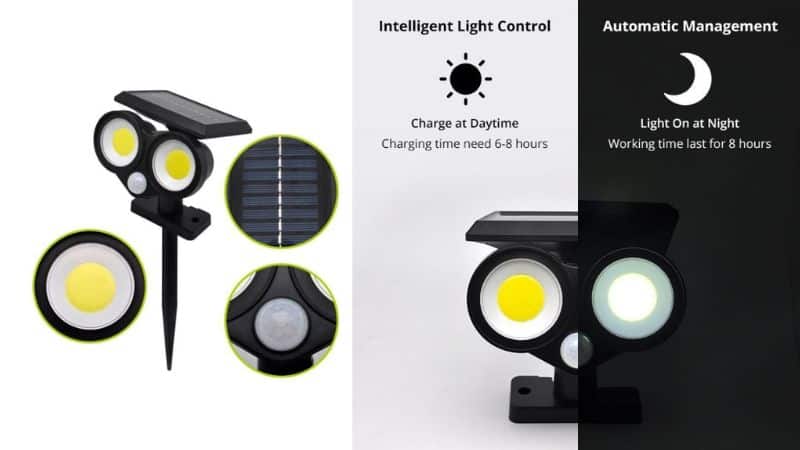
- The solar panel quality matters too.
Monocrystalline panels are usually more efficient than polycrystalline ones. This means they’ll charge better, even on cloudy days. Don’t forget about the light output. Look for the lumens rating – higher means brighter. But remember, super bright isn’t always better. It depends on what you’re lighting up.
- Pay attention to the battery type and capacity.
Lithium-ion batteries typically offer longer life spans compared to other types, allowing your lights to shine brightly for extended hours after sunset.
Preparing for Installation
Getting ready to install outdoor solar lights takes a bit of planning. You’ll need the right tools and materials on hand. Prepping your garden area is also key for a smooth installation process.
Tools and Materials Needed
For your solar light project, gather these items:
- Solar lights (your chosen style)
- Shovel or trowel
- Garden gloves
- Measuring tape
- Stake or marking flags
- Hammer (for stake lights)
Optional tools that may help:
- Garden scissors
- Level
- Wheelbarrow (for moving soil)
Make sure you have enough solar lights for your space. Check that batteries are included or buy extras if needed.
Preparing the Soil and Garden Beds
Start by picking spots for your lights. Look for areas that get plenty of sun during the day. Clear away any rocks, weeds, or debris from these spots.
For in-ground lights:
- Loosen the soil with a shovel
- Remove grass if needed
- Add some compost to improve drainage
For raised beds or planters:
- Check soil levels
- Add fresh potting mix if necessary
Mark your chosen spots with stakes or flags. This helps you visualize the layout before you start digging. Measure distances between lights to ensure even spacing.
Step-by-Step Guide to Installing Solar Lights
Installing solar lights in your outdoor space is a straightforward process that can enhance the beauty and safety of your yard. Follow this step-by-step guide to ensure a successful installation.
Step 1. Choose the Right Location
- Assess Sunlight Exposure: Identify areas in your yard that receive at least 6-8 hours of direct sunlight daily. These spots are ideal for solar lights to charge effectively.
- Avoid Shadows: Stay clear of areas shaded by trees, buildings, or fences, as these will limit the sunlight your solar lights receive.
Step 2. Prepare the Installation Area
- Clear the Ground: Remove any rocks, weeds, or debris from the chosen spots for your solar lights.
- Loosen the Soil: If you’re installing in-ground lights, use a shovel to loosen the soil. Remove any grass if necessary and consider adding compost to improve drainage.
- Mark Placement: Use stakes or flags to mark where you plan to place each light, ensuring even spacing and a visually appealing layout.
Step 3. Install the Solar Lights
- Assemble the Lights: Take each solar light out of its package and follow the manufacturer’s instructions to assemble the parts. Most lights will have a stake that can be pushed into the ground.
- Place the Lights: Position the lights in the marked spots. Ensure they are level and aligned properly.
- Secure the Lights: For stake lights, push the stake firmly into the ground. For hard surfaces, you may need to drill holes and use screws to secure the lights.
Step 4. Activate the Lights
- Turn On the Lights: Most solar lights have a switch located on the back or bottom. Turn them on to ensure they function properly.
- Test Positioning: Before finalizing the installation, test the lights at night to see if they illuminate the desired areas. Adjust their positions if necessary.
Step 5. Adjust Settings for Optimal Performance
- Customize Settings: Many solar lights come with adjustable settings. Look for a dial or switch that allows you to control brightness or set timers.
- Experiment with Modes: Some lights offer different modes, such as steady or flashing. Adjust these settings based on your preferences.
By following these steps, you can successfully install solar lights in your outdoor space, enhancing both the aesthetics and safety of your garden while benefiting from the energy efficiency of solar power. Enjoy your beautifully lit yard!
Maintenance Tips for Outdoor Solar Lights
Taking care of your solar lights keeps them shining bright. Regular upkeep and quick fixes can solve most of the common issues.
Routine Maintenance Tips
- Check Functionality: Periodically test your lights to ensure they are working correctly. If they appear dim, check the solar panels for dirt or debris and clean them as needed.
- Inspect Batteries: Every few months, check the batteries for any signs of wear or corrosion and replace them if necessary.
Maximizing Efficiency and Performance
- Position your lights for optimal sun exposure. Avoid shady spots or areas under trees.
- Adjust the angle of solar panels seasonally. This helps them catch more rays as the sun’s path changes.
- Use reflective surfaces near your lights. This can boost the amount of light they absorb.
- Consider upgrading to newer, more efficient models. Technology improves constantly, offering better performance.
- Clean snow and ice off panels in winter. This keeps them working even in cold months.
- Test your lights regularly. If they’re dim, try resetting them or replacing parts.
Leveraging Solar Lighting for Outdoor Spaces
Solar lighting offers many benefits for outdoor areas. It can enhance your space, help the environment, and save you money. Let’s look at some key ways to use solar lights outside.
Decorative and Functional Uses
Solar lights come in many styles to suit different needs. You can use string lights to create a cozy atmosphere on your patio or deck. Path lights guide the way along walkways and driveways. Spotlights highlight trees, flowers, or yard features.
For security, try motion-sensor flood lights near entrances. Solar-powered address numbers make your home easy to find at night. Floating pool lights add a fun touch to backyard parties.
Mix and match different types of solar lights. This creates layers of light and interest in your outdoor spaces. You can move solar lights around easily to change up the look.
Environmental Benefits of Solar Lighting
Using solar lights helps protect the planet. They don’t need electricity from the power grid. This cuts down on fossil fuel use and greenhouse gases.
Solar lights have a small carbon footprint. They’re made with fewer harmful materials than regular bulbs. When they wear out, many parts can be recycled.
These lights don’t add to light pollution like some bright outdoor fixtures. They give off a softer glow that’s better for local wildlife. You won’t disturb your neighbors with harsh glare either.
Financial Advantages of Solar Outdoor Lighting
Solar lights can save you money over time. You don’t pay for the electricity they use. Your energy bills may go down if you switch from wired lights. The upfront cost of solar lights has dropped in recent years. Many affordable options are now available. You can start small and add more lights as your budget allows.
Most solar lights are easy to install yourself. You won’t need to hire an electrician or run expensive wiring. This cuts down on labor costs. Besides, solar lights need little upkeep. Just wipe the panels clean now and then. You won’t have to replace bulbs often. Many last for years with proper care.
*If you have any questions or want to know more about outdoor solar lights purchasing and installing, contact us today for professional advice.


