Riding a bike is an experience of freedom, fitness, and fun. But whether you’re a city commuter, a weekend road warrior, or a trailblazing mountain biker, your safety is paramount. One of the most crucial pieces of safety gear, often underestimated, is a good set of cycle lights.
We’ll break down everything you need to know to choose the perfect lights for your bike.
Why Bike Lights are a Non-Negotiable Cycling Needs
First things first: let’s reframe how we think about bike lights. They aren’t just an accessory for the dedicated night owl; they are a fundamental piece of safety equipment for every cyclist.
Beyond Nighttime: The Importance of Daytime Visibility
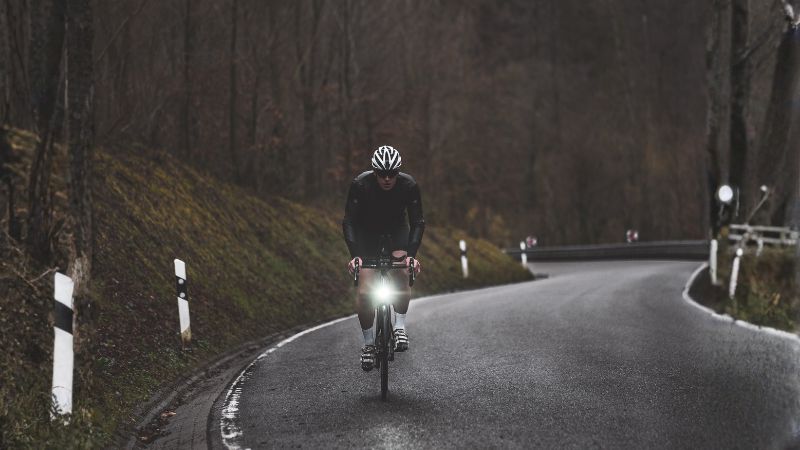
Did you know that the majority of cycling accidents involving cars happen during the day? The single most effective thing you can do to increase your safety is to make yourself more visible. A bright, flashing light used during the day—often called a Daytime Running Light (DRL)—dramatically increases the distance from which a driver can see you, giving them more time to react. It’s a simple change that can be a lifesaver.
“To See” vs. “To Be Seen”
Bike lights serve two primary functions, and understanding the difference is key to choosing the right one:
- To See: This is about illuminating the path ahead of you. A powerful front light with a focused beam is essential when you’re riding on unlit roads, dark bike paths, or technical trails where potholes, branches, and other hazards lurk in the shadows.
- To Be Seen: This is about making sure you are visible to everyone else on the road—drivers, pedestrians, and other cyclists. Both front and, critically, rear lights are vital for this. Flashing modes are particularly effective at grabbing attention.
Legal Requirements
In many places, it’s the law to have a white front light and a red rear light on your bike after sunset and before sunrise. While the specifics can vary, riding without lights in the dark is not only unsafe but could also land you a fine. Always check your local regulations to ensure you’re compliant.
Understanding Lumens, Beam Patterns, and Modes
The technical specifications on a light’s packaging can seem like another language. Let’s translate the most important terms.
Lumens Explained: How Bright is Bright?
A lumen is simply a measure of the total amount of visible light from a source. More lumens mean a brighter light. But more isn’t always better—it depends on where and when you ride. Using a trail-rated 1,200-lumen monster on a busy city bike path will only dazzle and annoy oncoming riders. Here’s a simple guide:
| Riding Condition | Front Light (Lumens) | Rear Light (Lumens) |
|---|---|---|
| Urban Commuting (Well-lit streets) | 100 – 300 | 50 – 100 |
| Suburban/Rural Roads (Some streetlights) | 400 – 800 | 100 – 200 |
| Trail Riding/Unlit Roads (Total darkness) | 800+ | 200+ |
Beam Patterns: Where the Light Goes
-
- Focused/Narrow Beam: Throws light a long way down the road, making it perfect for road cyclists moving at high speeds who need to see what’s coming up far in the distance.
- Wide/Flood Beam: Spreads the light out to illuminate the sides of the path or trail. This is a must-have for mountain bikers who need to see around corners and spot obstacles on their periphery.
- Cut-off Beam (StVZO): Popular in Germany, these lights have a flat-topped beam pattern that directs all the light down onto the road and out of the eyes of oncoming traffic. They are an excellent, considerate choice for urban commuters and road riders.
Light Modes: Adapting to Your Ride
-
- Steady: Your go-to mode for seeing where you’re going in the dark.
- Flashing/Pulsing: The best choice for daytime visibility (“to be seen”). The pulse of light is highly effective at catching the human eye.
- Eco/Low-Power: A lower-power steady or flashing mode that helps you conserve precious battery life on long rides or when you get caught out after dark unexpectedly.
4 Types of Bike Lights: Finding Your Perfect Match
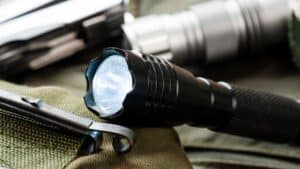
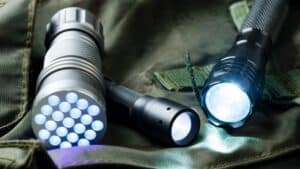
Front Bike Lights (Headlights):
The leader of the pack, your headlight is your guide in the dark and your beacon during the day. Think about your primary use: a small, easily removable “be-seen” light for the city, or a robust, powerful unit for lighting up dark country lanes.
Rear Bike Lights (Taillights):
Your taillight is arguably the most important “be-seen” light. A bright, powerful red light is your best defense against rear-end collisions. Look for models with attention-grabbing flash patterns and wide-angle visibility so you can be seen from the side as well as from behind.
Light Sets:
Often, the most economical and practical choice is to buy a pre-matched front and rear light set. The manufacturer has already paired them for a similar purpose (like commuting or road riding) and they often share charging cables and have complementary run times.
Helmet and Wearable Lights:
Mounting a small light on your helmet is a fantastic secondary option. The light points wherever you look, which is great for seeing around corners or grabbing a driver’s attention with a quick turn of your head. However, due to its height and potential for a less-stable beam, it should be used as a supplement to, not a replacement for, handlebar and seatpost-mounted lights.

Power and Mounting: The Practical Considerations
A light is only good if it’s charged and securely attached to your bike.
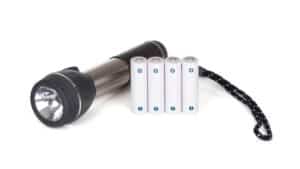
Battery Type:
-
- USB Rechargeable (Li-ion): This is the modern standard for good reason. It’s convenient, cost-effective, and environmentally friendly. You can charge your lights at your desk at work or from a power bank. Look for models with USB-C, which offers faster charging and a reversible connector.
- Dynamo Hubs: For the serious, all-weather commuter or long-distance tourer, a dynamo system that generates power from your spinning wheel hub is the ultimate set-and-forget solution. It’s a bigger initial investment but provides endless power without ever needing a recharge.
Mounting Systems:
-
- Silicone Straps: Incredibly versatile and easy to attach or remove without tools. They fit a wide variety of handlebar and seatpost sizes.
- Screw-on Mounts: Provide a rock-solid attachment that won’t budge, even on the roughest mountain bike trails or pothole-filled streets.
- Compatibility: Double-check that the mount will work with your bike. Modern bikes with flat, aerodynamic (“aero”) handlebars and seatposts often require specific mounts.
Durability and Water Resistance (IP Rating):
Cyclists ride in all conditions, and your lights should be able to handle it. The “IP” rating tells you how well a light is sealed against dust and water. An IPX4 rating means it can handle splashes from any direction (fine for rain), while an IPX6 rating can withstand powerful water jets. We recommend a minimum of IPX4 for any light.
Smart Features: The Future of Bike Lighting
Bike lights are getting smarter every year. While not essential, these features add a fantastic layer of safety and convenience.
- Ambient Light Sensors: The light automatically adjusts its own brightness or switches from day-flash to a steady night beam as conditions change.
- Brake-Sensing Lights: A built-in accelerometer detects when you’re slowing down and automatically increases the rear light’s brightness, just like a car’s brake light.
- ANT+ / Bluetooth Connectivity: Allows you to pair your lights with a bike computer (like a Garmin or Wahoo) to check battery status, control modes, and even have them turn on automatically when you start your ride.
- Radar Technology: Some high-end rear lights, like the Garmin Varia, incorporate a radar system that detects approaching vehicles from up to 140 meters away and sends visual and audible alerts to your bike computer or smartphone.
Conclusion: Light Up Your Ride with Confidence
Choosing the right cycle light isn’t about getting the brightest, most expensive option. It’s about honestly assessing your primary riding style and environment and picking the tool that’s right for the job. By understanding lumens, beam patterns, and the critical difference between seeing and being seen, you can make a choice that dramatically boosts your safety and enjoyment on every single ride.
Ready to find the perfect light for your ride? Explore our curated collection of high-performance cycle lights at mfopto.com and ride safer, day or night.
Frequently Asked Questions (FAQs) About Bike Lights
1. How many lumens do I actually need for my bike light?
That’s the million-dollar question! It really depends on where you ride. For city commuting in well-lit areas, 100-300 lumens for your front light is plenty to be seen . If you’re on darker suburban or rural roads, aim for 400-800 lumens to help you see the path ahead . For pitch-black trails, you’ll want 800 lumens or more to properly light up obstacles . For a rear light, anything from 50-200 lumens with a good flashing pattern is excellent for visibility.
2. Should I use a flashing or steady light?
It depends on the light’s purpose. For your rear light, a flashing or pulsing mode is almost always better because the pattern is more eye-catching to drivers, especially during the day . For your front light at night, a steady beam is better for actually seeing the road or trail in front of you . A good strategy is to use a steady front light to see and a flashing rear light to be seen.
3. What is more important: brightness (lumens) or beam pattern?
They are both incredibly important! A light with a high lumen count is useless if the beam pattern doesn’t put the light where you need it . For road riding, a more focused, narrow beam helps you see farther down the road. For trail riding, a wide beam is crucial to see obstacles on your periphery . A bright light is only truly useful when its beam is wide and evenly distributed .
4. How long should my bike light’s battery last?
Your light’s run time should comfortably exceed the length of your longest typical ride . Always check the run time for the specific mode you plan to use. A light might advertise a 20-hour run time, but that’s likely on its lowest-power flashing mode . The run time on its brightest, steadiest setting could be as short as 90 minutes .
5. Are rechargeable lights better than ones with disposable batteries?
For most people, yes. USB rechargeable lights are more convenient and cost-effective in the long run . You don’t have to keep buying new batteries. However, the advantage of disposable AA or AAA batteries is that you can easily carry spares for peace of mind on a very long ride, or find replacements in a pinch if you get caught out .
6. Where is the best place to mount my lights?
Generally, you should mount your white front light on your handlebars and your red rear light on your seatpost. It’s also a good idea to place them as far apart as possible to create a larger visual profile . Some riders add a second light to their helmet. This is great for visibility as it’s higher up, and it allows you to point light wherever you look, which is handy for seeing around corners.